🎉 Exciting News: Home X is now Kahuna Comfort Plumbing, Heating & Air! 🎉

Author: Eric

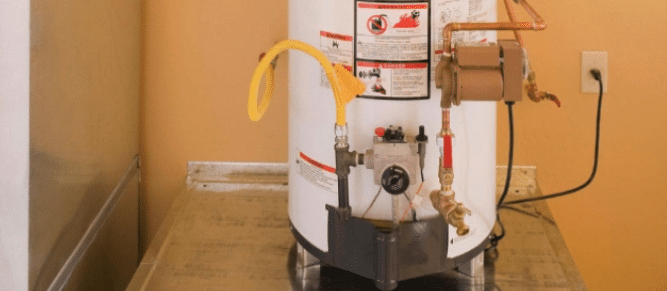
Plumbing Checks Before Buying a House: A Wise Investment

When purchasing a new home, the allure of gleaming countertops and spacious bedrooms may overshadow the importance of a thorough plumbing inspection. However, neglecting this crucial step can have significant repercussions on both your investment and future peace of mind.

The Importance of Plumbing Checks:

Unseen Issues:

Plumbing problems are often concealed behind walls and beneath floors. A comprehensive inspection can reveal potential issues, preventing unwelcome surprises post-purchase.

Preventing Future Costs:

Identifying plumbing issues beforehand allows for necessary repairs or replacements, saving you from costly surprises down the road. Leaks, faulty pipes, or outdated systems can lead to substantial expenses if left unaddressed.

Ensuring Safety:

Faulty plumbing can pose safety hazards, such as water damage or mold growth. A thorough inspection ensures that the home is a safe environment for you and your family.

Negotiating Power:

Uncovering plumbing issues during the inspection provides leverage for negotiation. You can either request repairs or adjust the purchase price to accommodate necessary fixes.

Future-Proofing:

Investing in a home with robust plumbing systems ensures long-term durability. Knowing the state of the plumbing allows you to make informed decisions about potential upgrades or improvements.

Impact on Home Prices:

Price Adjustments:

If plumbing issues are identified, you may negotiate a lower purchase price to offset the cost of repairs.

Market Value Considerations:

Homes with well-maintained plumbing systems generally command higher market values. A thorough plumbing inspection can contribute positively to the perceived value of the property.

Potential Deal-Breaker:

Severe plumbing issues can become deal-breakers for some buyers. Sellers are often motivated to resolve these issues or adjust the price accordingly to facilitate a smoother transaction.

A plumbing inspection is not just a formality but a strategic investment in your home purchase. It ensures the safety and durability of your new dwelling while providing the opportunity for informed negotiations. A well-maintained plumbing system contributes not only to your peace of mind but also to the long-term value of your investment.

How to Make a Successful Water Leak Insurance Claim

Water leaks in your home can be an unexpected stressor, particularly when it comes to filing an insurance claim. Many homeowners are left wondering if insurance covers plumbing-related water leaks. This can lead to confusion and concern over how to proceed and what to expect from the claims process.

Understanding your homeowner’s insurance policy and knowing how to navigate the claims process can make a significant difference in the outcome of your claim. This article is designed to guide you through making a successful water leak insurance claim, specifically focusing on plumbing-related issues.

In this article, you will learn:

  • How to determine if your homeowner’s insurance covers plumbing-related water leaks.
  • The step-by-step process for filing a successful water leak insurance claim.
  • Tips to maximize your claim’s success rate and avoid common pitfalls.

Let’s dive into the details and ensure you’re prepared to handle a water leak insurance claim with confidence.

Understanding Your Homeowner’s Insurance Policy

Homeowner's insurance policy form

Navigating the complexities and legalese of homeowner’s insurance can be daunting, especially when it comes to water damage. It’s better to know what your policy covers before a leak occurs, so you’re not caught off guard.

Generally, homeowner’s insurance policies cover sudden and accidental water damage. This can include damage from burst pipes, but there are nuances to be aware of.

What’s Typically Covered

Most standard policies cover:

  • Sudden and Accidental Damage: This includes water damage from a burst pipe or a plumbing system failure.
  • Dwelling Coverage: This part of your policy typically covers the structure of your home, including floors, walls, and ceilings damaged by water.
  • Personal Property Coverage: If your belongings are damaged due to a plumbing leak, this coverage can help replace them.

What’s Not Normally Covered

  • Gradual Damage: Damage occurring over time, such as a slow leak that was not addressed, is often excluded.
  • Maintenance Issues: Homeowners are generally expected to maintain their plumbing systems. Negligence or failure to make repairs can lead to denied claims.
  • Flood Damage: It’s important to note that flooding from external sources is not covered under standard homeowner’s insurance policies. Separate flood insurance is required for this type of damage.

Case Studies or Examples

  • Covered Scenario: A homeowner wakes up to find their kitchen flooded due to a burst pipe under the sink. The damage to the kitchen cabinets and flooring is typically covered under their policy, minus the deductible.
  • Non-Covered Scenario: Over several months, a small leak from a bathroom pipe causes mold behind the walls. Since the leak was gradual and not sudden, the insurance company denies the claim.

Understanding the specifics of your policy is key to navigating a water leak claim. It’s advisable to review your policy annually with your insurance broker and discuss any unclear aspects with your insurance agent. This proactive approach can help you make informed decisions about additional coverages, such as water backup coverage, which can offer extra protection.

Identifying and Documenting Water Leaks

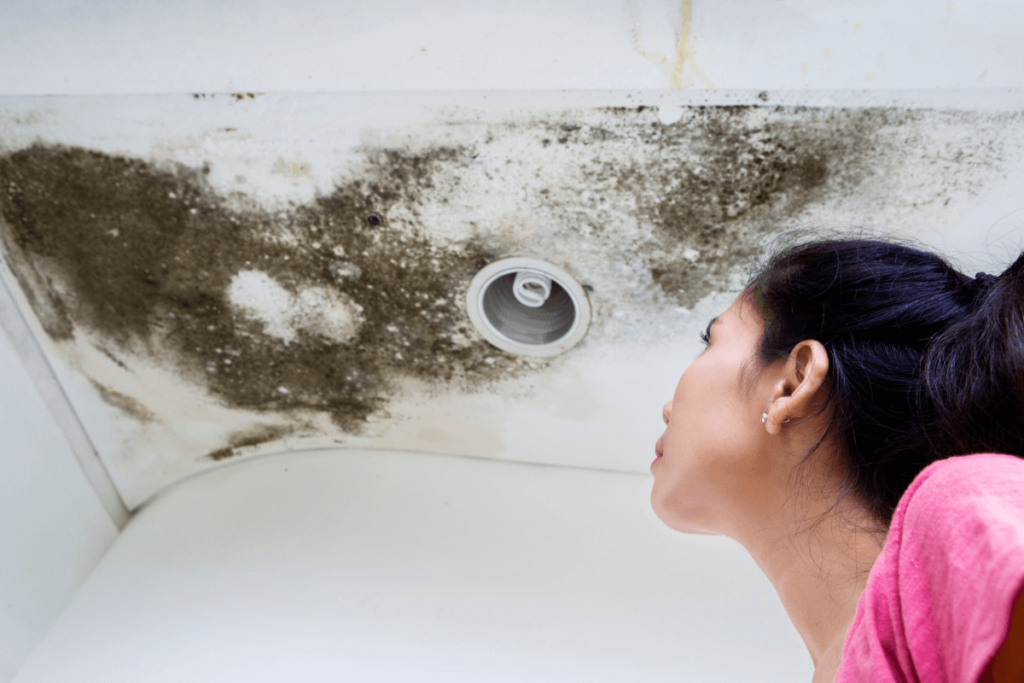
Woman looking up at signs of water damage in her ground floor ceiling

Discovering a water leak in your home requires immediate action, not only to minimize damage but also to ensure your insurance claim is supported by strong documentation.

Initial Steps to Take When You Discover a Water Leak

  1. Stop the Water Source: If possible, turn off the water supply to the affected area to prevent further damage.
  2. Identify the Leak’s Source: Determine where the leak is coming from, such as a burst pipe or a faulty appliance.
  3. Contact a Professional: For significant leaks, it’s crucial to call a plumber immediately. They can fix the problem and provide a report that can support your insurance claim.

Importance of Documenting the Damage

  • Take Photos and Videos: Document the extent of the water damage as soon as possible. Capture images of the source of the leak, affected areas, and damaged property.
  • Keep Records of Repairs: Save your receipts and detailed records of any emergency repairs and professional assessments. This information will be vital when filing your claim.

Professional Assessments

  • Hire a Water Damage Specialist: In some cases, it might be beneficial to hire a water damage specialist. They can assess the full extent of the damage, including potential mold growth or structural issues that are not immediately visible.
  • Obtain a Detailed Report: Ensure you receive a detailed report from any professional assessments. This should include the cause of the leak, the extent of the damage, and the recommended repairs. This report can significantly strengthen your insurance claim.

Documenting your damage comprehensively and obtaining professional assessments are crucial steps in the claims process. These actions not only help in filing your claim but also in ensuring you receive a fair assessment from your insurance company.

Filing Your Water Leak Insurance Claim

Homeowner signing off on plumbing work documentation

After identifying and documenting the water leak, the next step is to file your insurance claim. This process can vary slightly between insurance companies, but the following steps outline the general procedure.

Necessary Documentation for Filing a Claim

  • Insurance Policy Number: Have your policy number ready. This is the first thing your insurance company will ask for.
  • Detailed Documentation of Damage: Include all photos, videos, and professional reports you’ve collected. The more detailed your documentation, the stronger your claim.
  • List of Damaged Items: Prepare a detailed list of damaged property, including the estimated value and purchase date of each item.

Communicating with Your Insurance Provider

  • Initial Contact: Reach out to your insurance provider as soon as possible to start the claim process. You can typically do this over the phone, via an online portal, or through a mobile app, depending on your insurer.
  • Provide Detailed Information: When you file the claim, be prepared to provide detailed information about the extent of the water damage and any immediate actions you’ve taken.
  • Ask Questions: Inquire about the next steps, the timeline for the claim process, and if there are any specific requirements or additional documentation needed from your side.

What to Expect During the Insurance Adjuster’s Visit

  • Scheduling an Appointment: Your insurance company will send an adjuster to examine the damage. Be sure to schedule a time when you can be present.
  • The Inspection: The adjuster will inspect the damaged areas, review your documentation, and assess the overall impact of the leak.
  • Discussion of Next Steps: After the inspection, the adjuster will explain the next steps in the claim process, including an estimated timeline for repairs and compensation.

Filing a claim requires organization and attention to detail. By providing comprehensive documentation and effectively communicating with your insurance provider, you can streamline the process and increase your chances of a favorable outcome.

Maximizing Your Claim’s Success

Securing a successful outcome for your water leak insurance claim involves more than just submitting documentation. Here are strategies to ensure your claim is taken seriously and to maximize your chances of receiving a fair settlement.

Strategies to Ensure Your Claim is Taken Seriously

  • Be Proactive and Persistent: Follow up regularly on the status of your claim. Regular communication keeps your case active and can help expedite the process.
  • Use Clear, Concise Language: When describing the damage, be clear and factual. Avoid speculative language that could be used to minimize your claim.
  • Leverage Professional Assessments: Professional reports from plumbers or water damage specialists can provide authoritative support for your claim, emphasizing the necessity of covered repairs.

How to Dispute a Denied Claim or Negotiate a Better Settlement

  • Understand the Reason for Denial: Request a detailed explanation for any denial or lowball offer. This information is crucial for formulating your response.
  • Gather Additional Evidence: If your claim is denied or undervalued, additional documentation or a second opinion from another professional may strengthen your case.
  • Consider Hiring a Public Adjuster: Public adjusters represent your interests and can help negotiate with the insurance company. They’re particularly valuable in complex claims or when disputing a decision.

The Role of a Public Adjuster: Pros and Cons

  • Pros: Public adjusters have expertise in insurance claims and can often negotiate higher settlements. They handle the negotiation process, reducing stress and freeing up your time.
  • Cons: Public adjusters charge a fee, typically a percentage of the claim settlement. It’s important to weigh the potential higher settlement against these costs.

Taking these steps can significantly improve the outcome of your claim. It’s about being informed, prepared, and willing to advocate for your interests effectively.

Preventative Measures to Avoid Future Water Leaks

Proactive maintenance and smart home improvements can significantly reduce the risk of future water leaks. Here are practical tips for keeping your plumbing system in top condition and leveraging technology to detect leaks early.

Regular Maintenance Tips for Plumbing Systems

  • Regular Inspections: Schedule annual inspections of your plumbing system to detect leaks and repair minor issues before they become major problems.
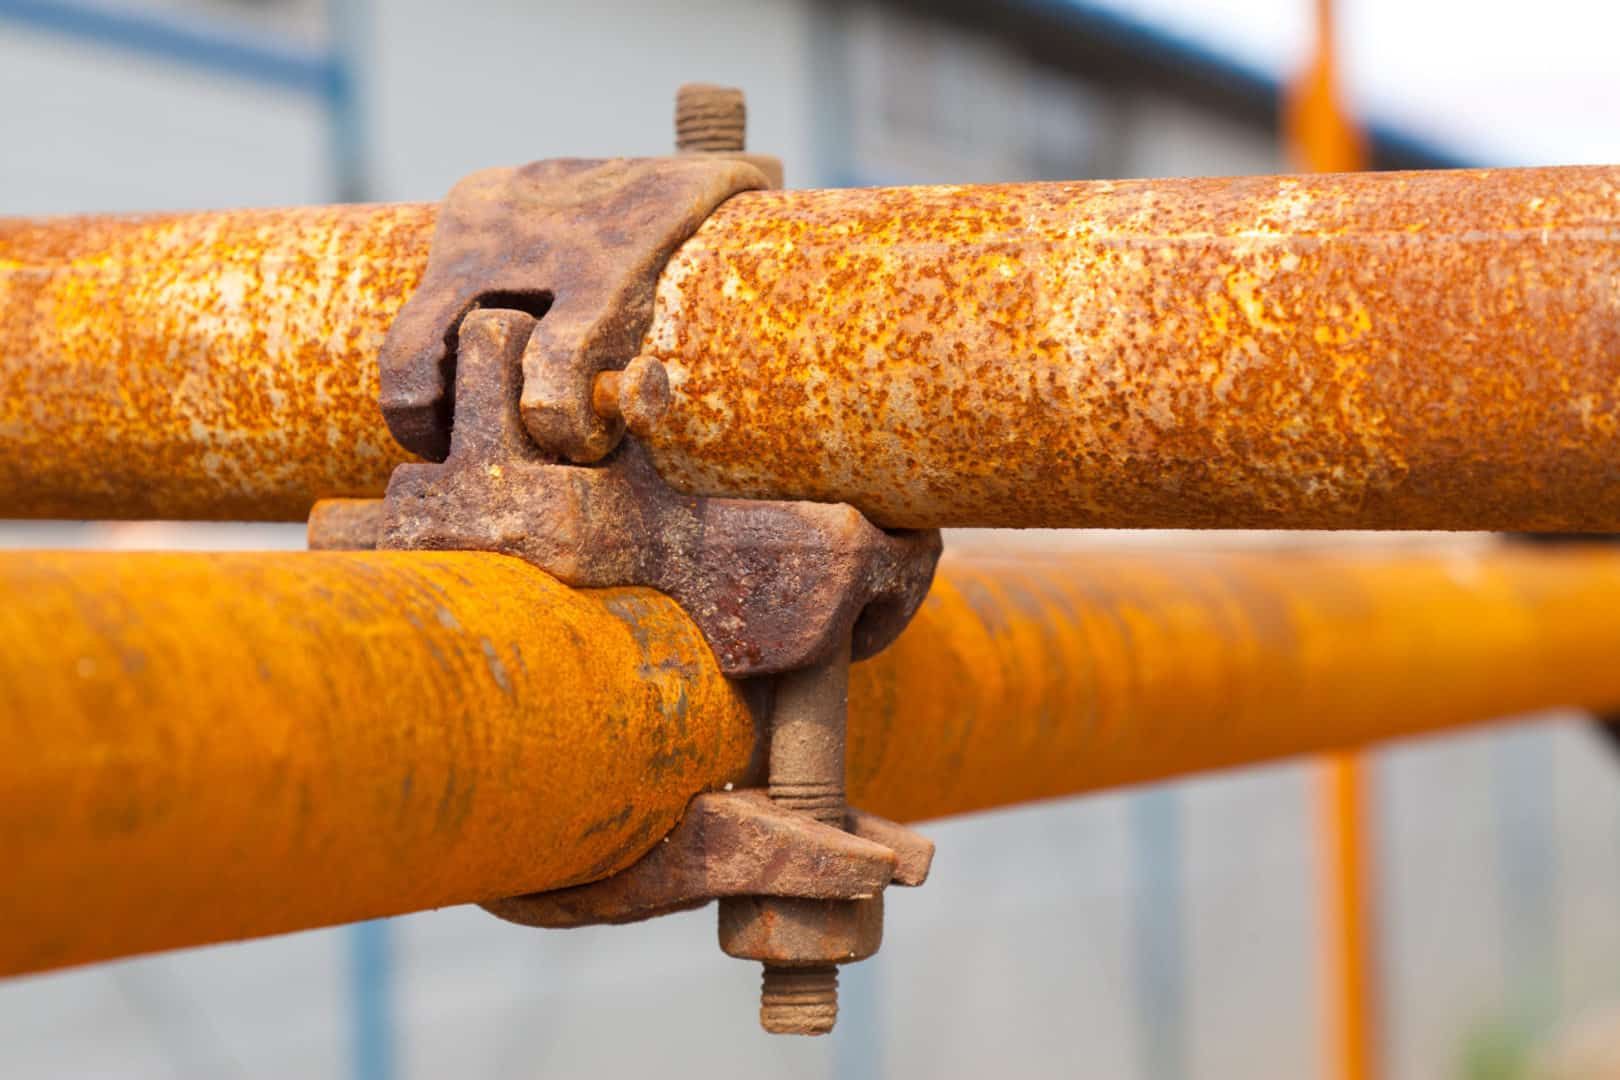
  • Replace Old Pipes: If your home has old or corroded pipes, consider re-piping and replacing them. Modern materials are much less prone to leaking.
  • Monitor Water Pressure: High water pressure can strain pipes and lead to leaks. Install a pressure regulator if needed.

Impact on Insurance Premiums

  • Lower Risk, Lower Premiums: Demonstrating proactive measures to prevent leaks can lower your risk profile, potentially leading to lower insurance premiums.
  • Discounts for Smart Home Devices: Some insurance companies offer discounts for homes equipped with leak detection and prevention technology.

Taking preventative measures against water leaks not only protects your home but can also have a positive impact on your insurance relationship. By demonstrating that you’re actively reducing risk, you can potentially save on premiums and avoid the hassle of future claims.

3 Proven Techniques for Removing Hard Water Stains from Glass Surfaces

Hard water stains on glass can mar the beauty of your home’s windows, shower doors, and other surfaces, leaving them looking cloudy and unclean. Removing these stubborn marks isn’t as easy as just wiping them away, and it often leaves homeowners battling against their water. The frustration is real, but so is the possibility of crystal-clear glass.

Ready to remove your hard water stains? Here’s what we’ll cover:

  • The science behind hard water stains and why they are so persistent.
  • 3 proven methods for removing hard water stains from glass.
  • Preventative measures to keep hard water stains from returning.

With the right knowledge and techniques, you can win the fight against hard water stains and restore the sparkle to your glass surfaces. Let’s uncover the secrets to achieving streak-free glass.

Understanding Hard Water Stains

Ever noticed those frustratingly persistent spots and films on your glass surfaces that just won’t go away, no matter how hard you scrub? That’s the handiwork of hard water.

When water loaded with minerals like calcium and magnesium evaporates, it leaves behind a crusty white residue that can be a real eyesore. This isn’t just any dirt or grime; it’s a mineral deposit that’s formed a bond with the surface of your glass, making it notoriously tough to remove.

Hard water stains are more than just a cosmetic issue. They can actually damage glass over time, etching into the surface and causing permanent marks if left untreated. What sets hard water stains apart from other types of glass discoloration, such as soap scum or mildew, is their origin and stubbornness. While most other stains are organic and can be washed away with regular cleaning agents, hard water stains require a bit more elbow grease and the right strategy to get rid of.

The battle against hard water stains isn’t just about keeping your glass looking clean; it’s about preserving the integrity and longevity of your glass surfaces. With the right approach, you can remove these blemishes and prevent future ones from forming. Stay tuned as we dive into the proven methods for banishing hard water stains for good.

Hard Water Stain Removal Method 1: Vinegar and Water

If you’re looking for a simple, eco-friendly solution to tackle hard water stains, you can’t go wrong with the classic vinegar and water mixture. This method is a favorite for many due to its effectiveness, affordability, and minimal environmental impact. Here’s how to make those glass surfaces sparkle again:

  1. Mix the Solution: Combine equal parts of white vinegar and water in a spray bottle. Vinegar’s acidic nature makes it perfect for dissolving those tough mineral deposits that water leaves behind.
  2. Apply Generously: Spray the vinegar solution directly onto the glass with hard water stains. Don’t be shy—ensure the surface is thoroughly soaked to allow the vinegar to work its magic.
  3. Let It Sit: Let the solution sit on the glass for at least 15 minutes. For more stubborn stains, you might want to wait up to 30 minutes. This gives the vinegar time to break down the mineral buildup.
  4. Scrub Gently: Using a soft sponge or cloth, gently scrub the glass in a circular motion. You’ll find that the stains start to lift away as the vinegar does its job.
  5. Rinse and Dry: Once the stains have been scrubbed away, rinse the glass with clean water and dry it with a lint-free towel or cloth to prevent new stains from forming.

Why does vinegar work so well? Its acidity targets the alkaline minerals, effectively breaking them down and making it easier to wipe the slate clean. Plus, it’s a natural disinfectant, leaving your glass not only stain-free but also hygienically clean.

Hard Water Stain Removal Method 2: Baking Soda Paste

Mixing baking soda with water

When vinegar alone doesn’t cut it, or you’re dealing with particularly stubborn hard water stains, baking soda comes to the rescue. This common household item is not just for baking; its mild abrasive properties make it an excellent choice for removing tough stains without damaging glass. Here’s how to use baking soda to bring back the shine to your glass surfaces:

  1. Create the Paste: Mix a small amount of water with baking soda to form a thick paste. The consistency should be similar to toothpaste, allowing it to stick to the glass surface without running off.
  2. Apply the Paste: With a soft cloth or sponge, apply the baking soda paste directly onto the stained areas. Be generous but focused on the spots that need the most attention.
  3. Scrub Gently: Using a soft-bristled brush or the cloth, gently scrub the paste into the stains in a circular motion. The gentle abrasiveness of baking soda works to lift the mineral deposits from the glass.
  4. Let It Sit: Allow the paste to sit on the glass for about 15 minutes. This dwell time gives the baking soda a chance to break down the hard water stains further.
  5. Rinse Thoroughly: After letting it sit, rinse the glass with clean water. Ensure all the baking soda residue is washed away, as leftover paste can leave a white film on the glass.
  6. Dry and Polish: Dry the glass with a lint-free cloth or towel. For an extra sparkle, you can polish the glass with a clean microfiber cloth or newspaper for streak-free results.

Baking soda is not only effective but also safe for most glass surfaces, making it a go-to choice for eco-conscious cleaners. Its natural deodorizing properties can also help eliminate any lingering smells, leaving your glass and your home smelling fresh.

Hard Water Stain Removal Method 3: Commercial Cleaners

Generic commercial glass cleaners

If you’re cleaning glass, the previous methods probably have you covered. But for those who are dealing with particularly stubborn stains that natural remedies can’t tackle, commercial cleaners designed specifically for hard water stains can be highly effective.

These products often contain stronger chemicals that can quickly dissolve mineral deposits, making them a powerful ally in your cleaning arsenal. Here’s how to use them safely and effectively:

  1. Choose the Right Cleaner: Look for a cleaner that’s specifically formulated for removing hard water stains from glass. Products containing ingredients like hydrochloric acid, phosphoric acid, or acetic acid are particularly effective but should be used with caution due to their strength.
  2. Safety First: Always wear gloves and ensure the area is well-ventilated when using chemical cleaners. Read and follow the manufacturer’s instructions carefully to avoid damage to your glass surfaces or harm to yourself.
  3. Apply According to Instructions: Some cleaners can be applied directly, while others may need to be diluted. Apply the cleaner to the stained areas, adhering to the recommended contact time on the product’s label.
  4. Scrub if Necessary: For tough stains, gently scrub the treated area with a non-abrasive sponge or brush. Be mindful not to use anything too harsh that could scratch the glass.
  5. Rinse Well: Thoroughly rinse the glass with clean water after the recommended time has elapsed. Removing all traces of the cleaner is essential to avoid leaving behind any residue that could attract more dirt or cause damage.
  6. Dry and Inspect: Dry the glass with a clean, lint-free cloth. Inspect the area to ensure all stains have been removed. Repeat the process if needed, but always allow the glass to dry between applications to assess the results accurately.

While commercial cleaners can offer a quick and effective solution, they’re not always the most environmentally friendly option. Always consider the impact on your household and the environment when choosing to use chemical cleaners.

Preventing Hard Water Stains

Keeping hard water stains at bay is about more than just regular cleaning; it’s about minimizing the opportunities for those minerals to deposit on your glass in the first place. Here are some strategies to help you maintain clear, stain-free glass without constant scrubbing:

  • Use a Water Softener: Installing a water softener in your home can significantly reduce the mineral content in your water, attacking the problem at its source. This can be a game-changer for all your water-related cleaning tasks, not just for glass surfaces.
  • Squeegee After Use: Whenever possible, dry glass surfaces after they get wet. For glass in areas like the shower, use a squeegee after each use to remove water before it evaporates and leaves behind mineral deposits. It’s a simple step that can make a big difference.
  • Apply a Protective Coating: Various products on the market can create a protective barrier on your glass, repelling water and preventing stains. These can be especially useful for shower doors and windows in high-exposure areas.
  • Regular Cleaning: Regularly cleaning your glass surfaces with a mild detergent or one of the methods mentioned earlier can prevent hard water stains from setting in. Consistency is key to keeping your glass looking its best.

By incorporating these preventative measures into your routine, you can significantly reduce the occurrence of hard water stains, saving you time and effort in the long run. Maintaining clean glass surfaces becomes easier and more manageable, letting you enjoy the beauty of your home without the shadow of hard water stains.

From Stained to Sparkling: Concluding Our Hard Water Stain Remedies

Battling hard water stains on glass can seem like a never-ending struggle, but with the right approach, it’s a fight you can win. We’ve explored the science behind these stubborn stains and armed you with three effective strategies to not only remove them but prevent their return. From the simplicity and eco-friendliness of a vinegar and water solution to the robust power of commercial cleaners, there’s a method suited to every situation and preference.

Here’s a quick recap of what we covered:

  • Understanding the stubborn nature of hard water stains ensures you’re well-equipped to tackle them head-on.
  • Vinegar and water solutions, baking soda pastes, and commercial cleaners provide a toolkit for anyone looking to restore the shine to their glass surfaces.
  • Preventative measures such as using water softeners, squeegeeing after use, and applying protective coatings can significantly reduce the frequency and severity of hard water stains.

As you move forward, remember that regular maintenance and a proactive approach are your best defenses against the dulling effect of hard water. By integrating these methods and tips into your cleaning routine, you can keep your glass sparkling clear and your home looking its best.

How to Install a Bathroom Sink

Upgrading your bathroom with a new sink can be a rewarding DIY project. With the right tools and a bit of know-how, you can install a stylish sink to enhance both form and function. Here’s a step-by-step guide to help you through the process.

10-Step Guide to Installing a Bathroom Sink.

1. Gather Your Tools and Materials:

Before diving in, ensure you have all the necessary tools and materials. This typically includes a new sink, faucet, plumber’s putty, a wrench, a screwdriver, a bucket, and a pipe cutter.

2. Turn Off the Water:

Begin by turning off the water supply to the bathroom. Locate the shut-off valves beneath the sink or, if unavailable, turn off the main water supply for the entire house.

3. Remove the Old Sink:

Disconnect the plumbing beneath the old sink and remove any brackets or adhesive securing it to the countertop. Carefully lift the old sink out, taking care not to damage the surrounding surfaces.

4. Install the Faucet:

Place the faucet through the designated hole in the sink. Secure it from underneath using the provided nuts. Apply plumber’s putty around the base of the faucet to create a watertight seal.

5. Attach the Drain:

Connect the drain to the sink, ensuring a proper seal with plumber’s putty or a rubber gasket. Tighten the nut beneath the sink to secure the drain in place.

6. Position the New Sink:

Set the new sink into place, aligning it with the existing hole in the countertop. Double-check that it sits evenly and securely.

7. Connect the Water Supply:

Reconnect the water supply lines to the faucet, ensuring tight connections. Turn the water supply back on and check for any leaks.

8. Seal the Edges:

Apply a bead of silicone caulk around the edges of the sink where it meets the countertop. This creates a waterproof seal and enhances the sink’s stability.

9. Test for Leaks:

Turn on the faucet and check for any leaks around the connections. Tighten as needed to ensure a watertight seal.

10. Enjoy Your New Sink:

With everything securely in place and leak-free, your new bathroom sink is ready for use. Enjoy the upgraded aesthetics and functionality of your freshly installed fixture.

Now you know how to install a sink in your bathroom. However, if you ever experience problems, remember that you can always trust HomeX Plumbing. Call us now!

Decoding Liquid Drain Cleaners: Tips for Choosing the Right One.

When faced with a clogged drain, choosing the right liquid drain cleaner can be the key to a quick and effective solution. Here are some essential tips to consider before reaching for that bottle on the store shelf.

Identify the Clog Type:
Different drain cleaners are formulated to tackle specific types of clogs. Whether it’s hair, grease, or soap scum, understanding the nature of the blockage helps you choose a cleaner with the right ingredients.

Consider Environmental Impact:
Many traditional drain cleaners contain harsh chemicals that can be harmful to the environment. If eco-friendliness is a priority, opt for biodegradable or environmentally friendly formulas that won’t compromise your green values.

Evaluate Safety Precautions:
Safety should be paramount. Be aware of the potential hazards associated with the cleaner you choose. Some chemicals can emit noxious fumes, necessitating proper ventilation. Always follow safety instructions to protect yourself and your plumbing.

Check Compatibility with Plumbing:
Certain drain cleaners may be too aggressive for certain types of pipes. Verify that the product you choose is safe for your plumbing. Avoid using strong chemicals on older or fragile pipes to prevent damage.

Select Gel or Liquid Formulas:
Gel or liquid drain cleaners are often more effective than foam or crystal formulations. They can adhere to the pipe walls, ensuring better contact with the clog. Additionally, liquid formulas are easier to pour and control.

Opt for Multi-Purpose Cleaners:
Choosing a drain cleaner with multi-purpose capabilities can provide value for your money. Some products can handle both preventive maintenance and tackling stubborn clogs, offering versatility for various plumbing needs.

Read Reviews and Ratings:
Before making a purchase, read customer reviews and product ratings. Real-world experiences can offer insights into the effectiveness of a particular drain cleaner. Look for products with consistently positive feedback.

However, if you require professional assistance to maintain or repair your drains, preventing rodent issues, rest assured that HomeX Plumbing is here to provide you with quick, top-notch plumbing services. Give us a call or book your appointment now by clicking the button below.

Navigating the Pipeline: Pros and Cons of Liquid Drain Cleaners.

Liquid drain cleaners offer a swift and cost-effective solution for minor clogs but come with a set of drawbacks. The ease of use and preventive maintenance they provide is countered by the potential health risks, environmental impact, and long-term pipe damage associated with their harsh chemicals. Users should weigh these factors carefully.

Liquid drain cleaners, the unsung heroes of plumbing woes, offer a quick fix for clogged drains. However, like any superhero, they come with their set of strengths and weaknesses.

Advantages:

  1. Ease of Use: Liquid drain cleaners are incredibly easy to use. Simply pour the recommended amount into the drain, wait, and flush with water.
  2. Cost-Effective: Compared to professional plumbing services, liquid drain cleaners are a cost-effective solution for minor clogs. They’re readily available and don’t break the bank.
  3. Time Efficiency: Liquid drain cleaners work swiftly, providing a speedy resolution to minor blockages without the need for elaborate tools or professional intervention.
  4. Preventive Maintenance: Regular use of liquid drain cleaners can act as preventive maintenance, keeping pipes clear and preventing the buildup of debris.

Disadvantages:

  1. Harsh Chemicals: Most liquid drain cleaners contain harsh chemicals like sulfuric acid or lye, posing health risks. Inhalation or contact can lead to respiratory issues or burns, making them hazardous to use.
  2. Environmental Impact: The chemicals in liquid drain cleaners can harm the environment when disposed of improperly. They can contaminate water sources and soil, contributing to ecological damage.
  3. Pipe Damage: Continuous use of liquid drain cleaners can damage pipes. The corrosive nature of the chemicals may deteriorate pipes over time, leading to leaks and costly repairs.
  4. Ineffectiveness on Tough Clogs: Liquid drain cleaners might struggle with more stubborn clogs or blockages caused by solid objects. In such cases, professional intervention or alternative methods may be necessary.

Conclusion:

While liquid drain cleaners provide a quick and affordable solution for minor clogs, users should tread carefully. The harsh chemicals pose health and environmental risks, and overuse can lead to long-term pipe damage. It’s crucial to weigh the advantages against the disadvantages and, when in doubt, seek professional advice for a more sustainable and safer approach to plumbing issues.

Plumbing’s Origins: A Journey Through History

The evolution of plumbing is a tale that winds through centuries, shaped by ingenious minds determined to make water work for humanity. The origins of plumbing can be traced back to ancient civilizations, with each era contributing to the sophisticated systems we rely on today.

Ancient Mesopotamia:

The earliest plumbing systems emerged around 4000 BCE in Mesopotamia, where the ancient inhabitants created rudimentary channels to transport water for agricultural purposes. The famed Hanging Gardens of Babylon likely showcased early irrigation techniques, demonstrating an early understanding of water flow.

Ancient Egypt:

The Egyptians elevated plumbing to an art form. Around 2500 BCE, they constructed complex irrigation systems along the Nile and developed copper pipes for indoor plumbing. Elaborate bathrooms with flushing toilets were present in the homes of the elite, showcasing a remarkable grasp of hydraulic principles.

plumbing history

Ancient Rome:

The Romans, true engineering maestros, revolutionized plumbing around 500 BCE. Aqueducts, vast networks of pipes, and public baths showcased their mastery. Lead pipes, though harmful in hindsight, were widely used. Roman innovations laid the foundation for modern plumbing systems, emphasizing water distribution and sanitation.

Medieval Europe:

The fall of the Roman Empire led to a decline in plumbing advancements in Europe. Medieval societies relied on communal wells and primitive drainage systems. The lack of sanitation contributed to widespread health issues.

Renaissance and Beyond:

Plumbing experienced a renaissance during the 17th century. Sir John Harrington, an English courtier, invented the first flush toilet in 1596. However, it wasn’t until the 19th century that significant strides occurred. Alexander Cummings patented the first modern flushing toilet in 1775, and Thomas Crapper’s innovations in the late 1800s popularized indoor plumbing.

The evolution of plumbing is an intricate tapestry woven by the contributions of diverse cultures and innovative minds. From ancient irrigation channels to modern sewage systems, plumbing’s journey reflects humanity’s continuous quest for efficient water management and sanitation.

That trip was wonderful, but nowadays, we have highly modern plumbing systems in every house. If you’re in the LA area, you can book premium plumbing services for your home with HomeX Plumbing. Give us a call, and a Hero will come to your home.

Follow us on Instagram: @homex.plumbing

Follow us on X: @PlumbingHomex

Rats and Drains: Separating Fact from Fiction.

The idea of rats entering homes through drains has a touch of horror fiction, but the reality is rooted in the unique abilities of these rodents. While rare, it’s crucial to take preventive measures, such as sealing entry points, maintaining drains, and consulting professionals, to keep your home rat-free.

The notion of rats invading homes through drains has a certain horror-movie allure, but is it more than an urban legend? The truth lies in the peculiar abilities of these rodents and the vulnerabilities of our plumbing systems.

Can Rats Really Enter Through Drains?

While rats aren’t mystical creatures with supernatural powers, their anatomy allows them to navigate surprisingly tight spaces. Rats can swim and hold their breath for extended periods, and their skeletal structure is flexible enough to squeeze through openings as small as a quarter.

However, the idea of rats emerging from your toilet like a scene from a horror film is rare. It’s more likely they’d enter through damaged pipes or openings in the sewer line.

Preventing Rats Entry Through Drains:

Inspect and Seal Entry Points:

Regularly inspect your home for any openings that rats could exploit. Seal gaps or cracks in your foundation, walls, and around pipes. Remember, rats are excellent climbers, so consider both ground-level and upper-entry points.

Secure Vent Openings:

Vent openings on your roof or exterior walls may seem like inviting rat doorways. Cover them with mesh or grates designed to allow air circulation while keeping unwanted visitors out.

Maintain a Tidy Yard:

Rats are attracted to food sources, so keep your yard tidy. Secure garbage bins, clean up fallen fruits, and eliminate standing water, which can be a water source for these rodents.

Regular Drain Maintenance:

Ensure your drains are in good condition. Repair any cracks or leaks promptly, as these can be potential entry points for rats. Regular drain cleaning can also prevent blockages that might attract them.

Professional Inspection:

If you suspect a rat infestation, consult with a pest control professional. They can conduct a thorough inspection, identify vulnerabilities, and provide effective solutions to prevent or address the issue.

Conclusion:

While the scenario of rats emerging from drains is more Hollywood than reality, the possibility of rats entering your home through damaged pipes is plausible. Taking proactive measures to secure your home, maintain your plumbing, and address any issues promptly can significantly reduce the likelihood of unwelcome rodent guests.

However, if you require professional assistance to maintain or repair your drains, preventing rodent issues, rest assured that HomeX Plumbing is here to provide you with quick, top-notch plumbing services. Give us a call or book your appointment now by clicking the button below.

The Future of Plumbing: A.I. Integration for Enhanced Efficiency

The future of plumbing is set to be transformed by Artificial Intelligence (AI). From predictive maintenance and smart leak detection to virtual assistance and robotics in repairs, AI technologies promise to enhance efficiency, reduce costs, and provide a more seamless experience for plumbing workers and their customers.

Artificial Intelligence (AI) is rapidly transforming various industries, and plumbing is no exception. In the not-so-distant future, plumbing workers may find their tasks streamlined and optimized through the integration of AI technologies, revolutionizing the way they approach their work.

Predictive Maintenance: AI Predicts Plumbing Needs

Predictive maintenance is like having a crystal ball for your plumbing systems. By using AI and machine learning, you can predict when equipment might fail and fix it before it becomes a costly problem. This proactive approach not only saves you money but also keeps your customers happy by minimizing downtime.

AI algorithms analyze data from your plumbing systems to predict maintenance needs. This means you can address potential issues before they escalate, avoiding expensive emergency repairs and ensuring your equipment lasts longer.

Smart Leak Detection: Real-Time Leak Detection with AI

Detecting leaks can be a major headache, but AI-powered systems make it a breeze. These systems analyze data from sensors to detect leaks in real time, preventing water damage and unnecessary waste.

With AI, you can monitor water flow, pressure, and usage patterns, catching leaks as soon as they start. This not only saves you money but also helps conserve water and protect the environment.

Automated Diagnostics: AI Streamlines Plumbing Repairs

Imagine having a virtual plumbing expert at your fingertips. With AI-powered automated diagnostics, you can quickly and accurately diagnose issues in your plumbing systems, saving you time and money.

AI analyzes data from sensors to identify problems, allowing you to address them promptly. This means less downtime for your business and happier customers.

Virtual Assistance: AI-Powered Customer Support

AI-powered virtual assistants are like having a 24/7 customer service representative. These assistants can help customers schedule appointments, troubleshoot common issues, and provide basic plumbing advice.

By offering instant support, virtual assistants improve customer satisfaction and reduce wait times. They also help streamline communication processes, making your business more efficient.

Enhanced Inventory Management: AI-Optimized Inventory

AI can help you optimize your inventory levels, ensuring you always have the right parts on hand. By analyzing data and forecasting demand, AI reduces carrying costs and prevents stockouts.

With AI, you can automate the reordering process, ensuring you never run out of essential parts. This means you can focus on serving your customers instead of managing inventory.

Customer Service: AI-Driven Solutions for Better Service

AI-powered chatbots and virtual assistants can enhance customer service in the plumbing industry. These tools can handle routine inquiries, schedule appointments, and provide basic troubleshooting advice, allowing plumbing professionals to focus on more complex tasks.

Robotics in Repairs: The Future of AI-Powered Plumbing

Advanced robotic systems guided by AI can perform routine repairs in pipes and fixtures. These robots can navigate through plumbing systems, identify issues, and conduct repairs with precision, reducing the need for extensive manual labor.

At HomeX, we leverage cutting-edge technology for our work. Contact us for excellent service in the Anaheim and Southern California areas.

The Dos and Definitely-Don’ts of Unclogging Drains and Toilets

Dealing with a clogged drain or toilet can be as unpleasant as finding a surprise guest in your bathtub. While the temptation to channel your inner DIY-plumber is strong, some actions should come with a hazard sign and a “Don’t even think about it!” Here are the definitely-don’ts:

The Chemical Cocktail:
Mixing random chemical drain cleaners is like creating a science experiment gone wrong. It might not end in a volcanic eruption, but the toxic fumes and potential reactions could make your plumbing system wish it had a hazmat suit.

Superhero Cape Down the Toilet:
Flushing things like paper towels, diapers, or your cousin’s ill-fated superhero cape down the toilet won’t make them magically disappear. In fact, it might just create a plumbing villain with a vengeance.

Tree Roots vs. Garden Hose:
Trying to blast away tree roots with a garden hose is like bringing a water pistol to a root wrestling match. Roots need professional attention; your garden hose just needs to stick to watering plants.

Coat Hanger Circus Act:
Fashioning a coat hanger into a makeshift plumbing tool might seem resourceful, but your pipes will likely disagree. That clinking and clanking could be the overture to a disastrous drain symphony.

The Overly Ambitious Plunger:
A plunger is a trusty sidekick, but an overly ambitious plunging session can turn your bathroom into a splash zone. Plunge wisely, and remember, it’s about pressure, not Olympic diving.

The MacGyver Garbage Disposal Fix:
Attempting to MacGyver your garbage disposal with makeshift tools is a recipe for a sitcom-worthy disaster. Spare yourself the sitcom laughter; let a professional handle it.

The DIY “Drain Snake” Dance:
Macarena? Electric Slide? No, it’s the DIY drain snake dance. A real drain snake is a pro’s tool, not a dance partner. Leave the waltzing to the experts.

Book Online

"*" indicates required fields

This field is for validation purposes and should be left unchanged.

By clicking “Send Message”, I am providing express written consent to receive autodialed and pre-recorded calls, texts, and SMS/MMS with marketing communications from Kahuna Comfort regarding home services at the phone number provided above, even if the number is on a corporate, state, or national Do Not Call list. Consent is not a condition to purchase services or products.

Â